Home
Getting the T95 Plus to boot from an SD card
Darren Williams Front Page 10 August 2022 Hits: 9001
The following procedure will trash your Android installation. It is, however, easy to restore if you wish to.
You may need to install the drivers for USB first, these can be found here: DriverAssitant_v5.1.1.zip
By default the T95 Plus will always attempt to boot from emmc first. This means, out of the box, Android. If Android fails to boot, it will then boot from SD card.
We want a way to prevent this and instead boot from SD card without having to open the box and get the screwdrivers and soldering iron out. There is a windows tool that will allow us to do this. It is called AndroidTool.
What we need to do is to destroy the boot partition. If we do this, the box will just boot into recovery mode so we also need to destroy that too.
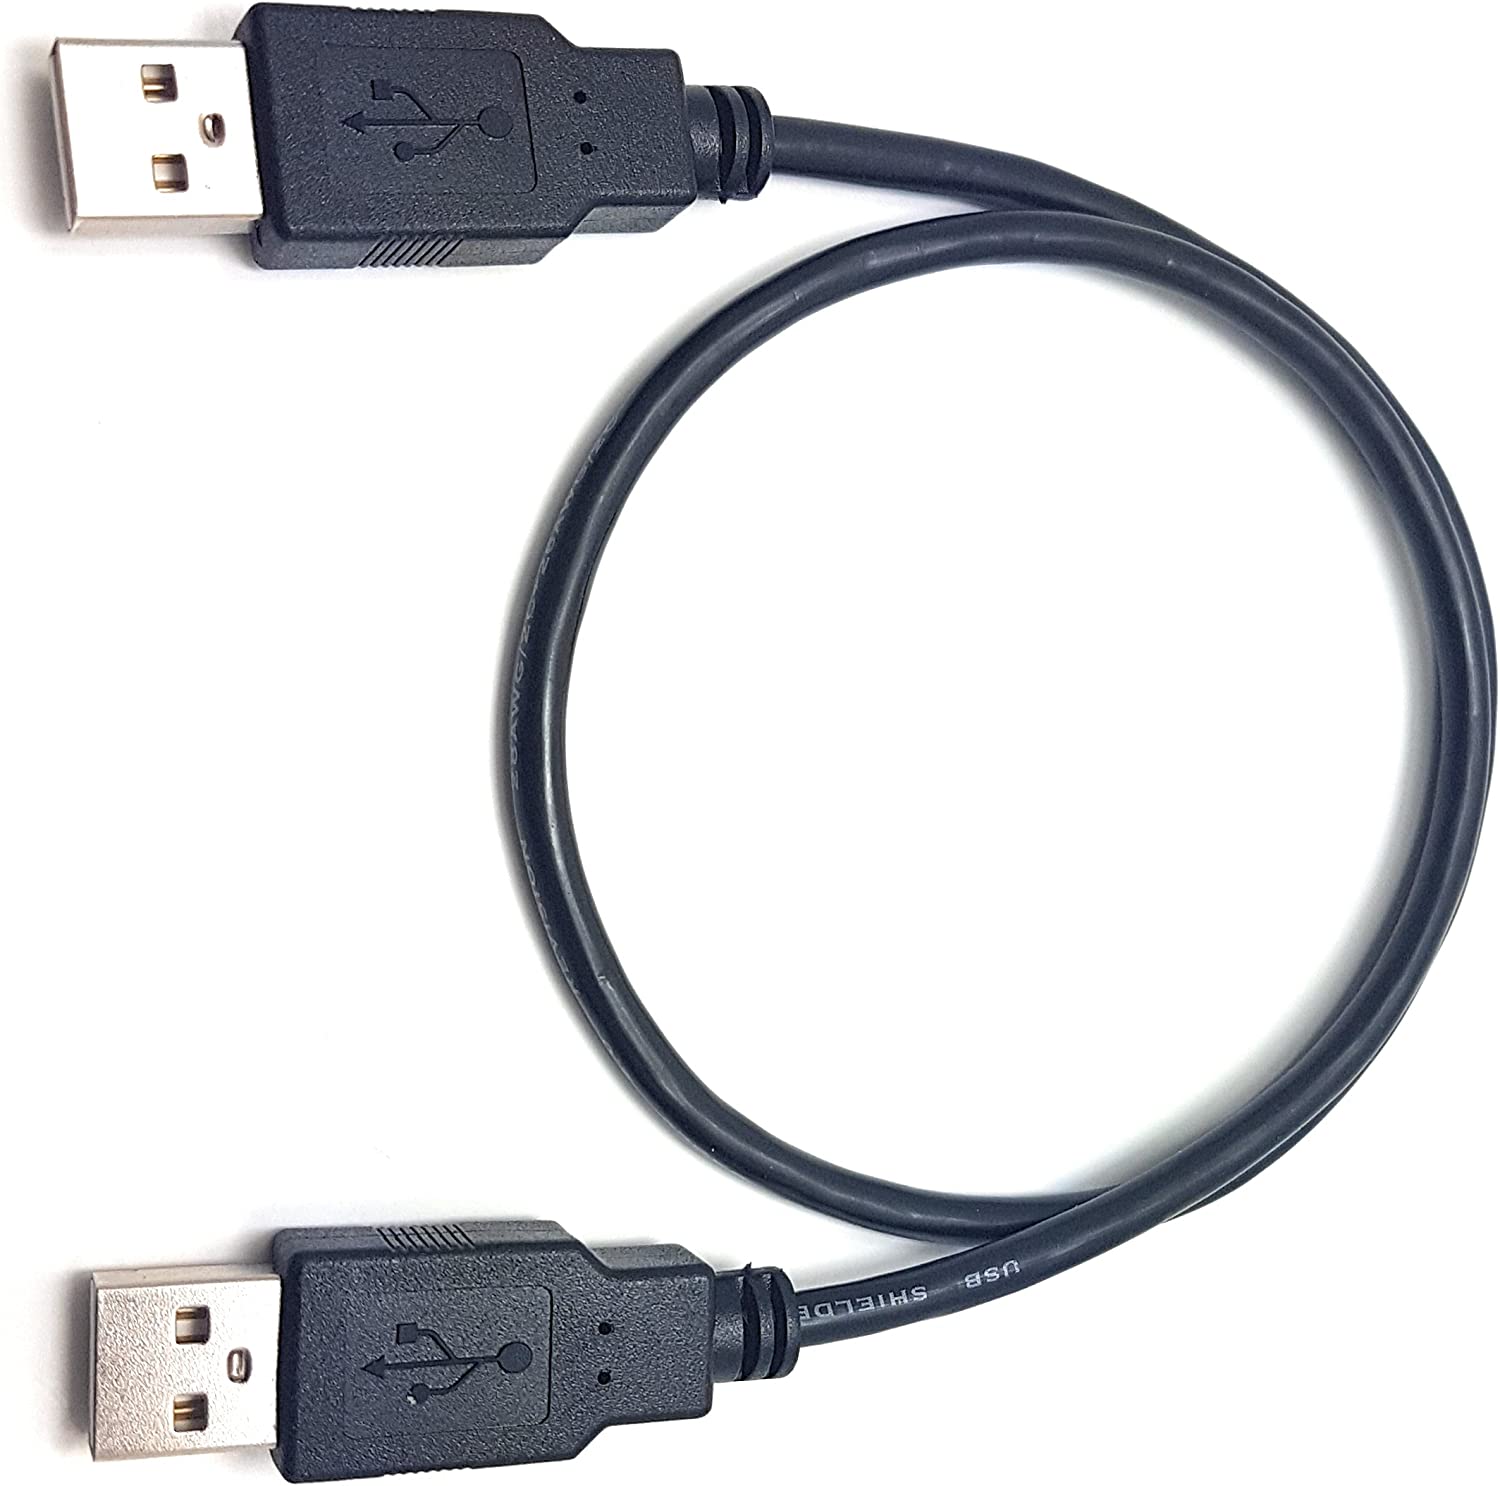
In order to use AndroidTool to do this you are going to need a USB A Male to USB A Male cable. These are readily available on Amazon.
If at any time during the procedure you somehow get lost or are not seeing exactly as below, just close the android tool and reopen it and start again. As long as you haven’t hit the final run command, nothing has changed. You will also not need to power the box on/off again as it should still be in loader mode and should indicate “Found one loader device” as soon as you open the tool.
Download AndroidTool and also download this small file wipe_part. We will be using that shortly.
Unzip AndroidTool and run AndroidTool.exe
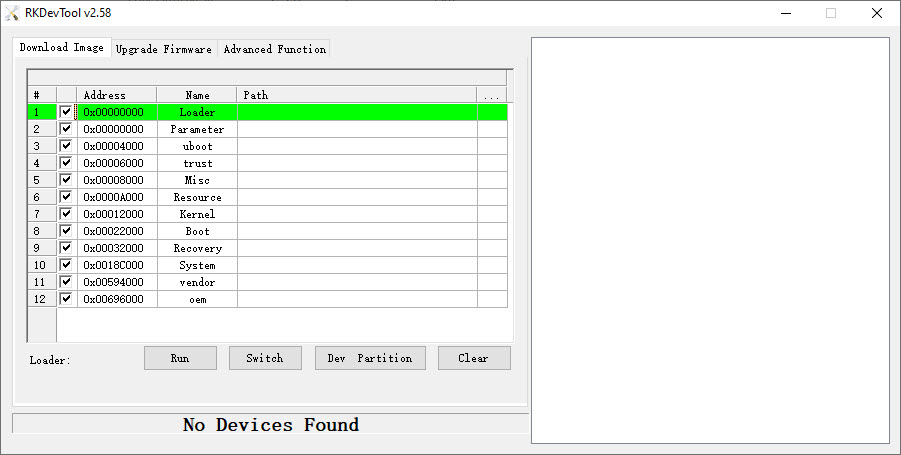
You should now have a screen similar to the following:
DO NOT APPLY POWER TO YOUR BOX, THE USB CABLE WILL PROVIDE THE POWER
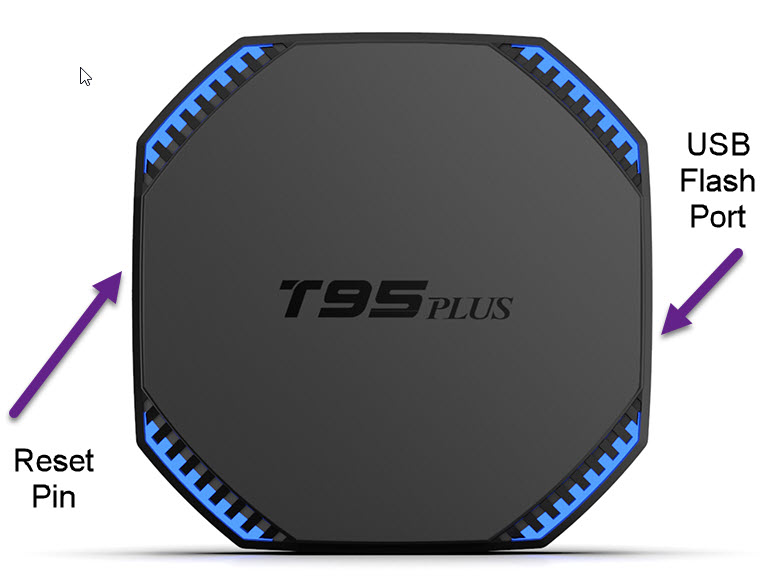
I actually find it easier to plug in the USB cable to the T95Plus first and then plug the other end into the PC whilst holding the reset pin in. Do whichever suits you best.
Now plug one end of your USB cable into the PC and whilst holding in the reset button on the T95Plus, plug in the other end of the USB cable into the USB port on the OPPOSITE side to the reset button. Your box should now power up and you should now see a screen similar to the following:
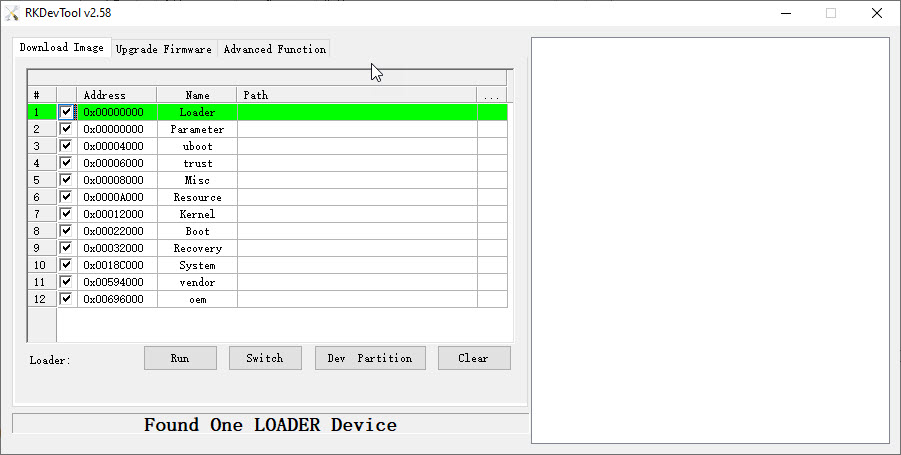
If you do not see the “Found One LOADER Device”, power off and try again as you have just probably slipped of the reset pin, it isn’t the easiest thing to do, holding the reset pin whilst plugging in the USB too.
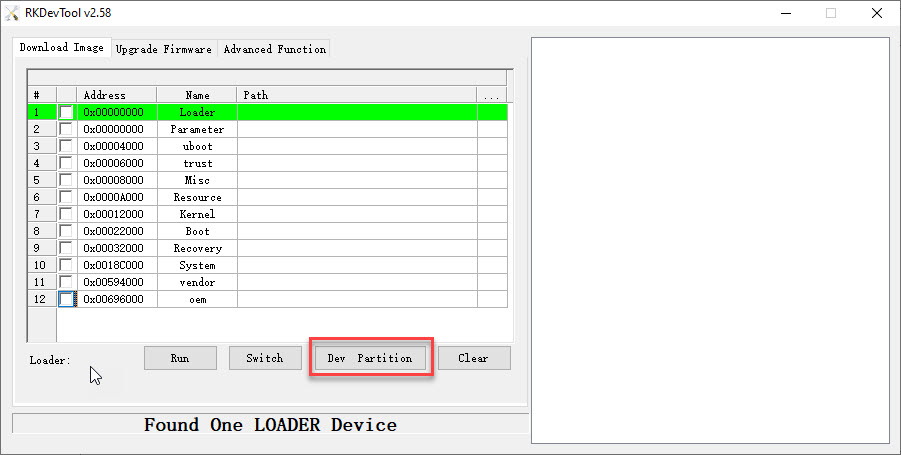
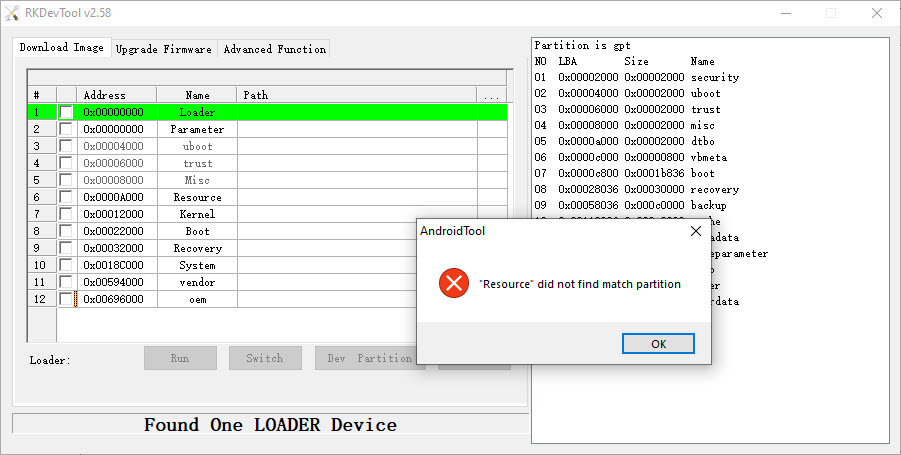
Uncheck all the boxes on the left hand side and then click the “Dev Partition” button, you will see a bunch of warning boxes, just click OK to them all.
This is is just warning us of missing partitions and also aligning AndroidTools default addresses with the ones it has found in our partition table:
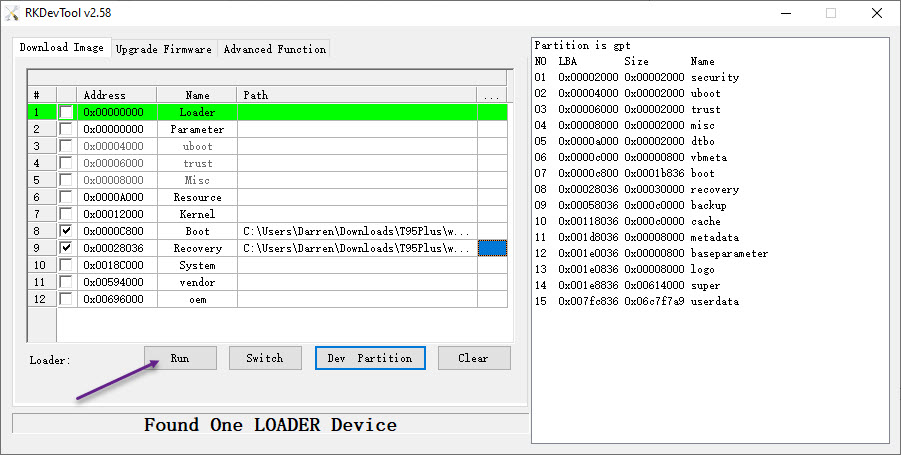
Now check the boot and recovery partitions, 8 and 9 and click in each of the boxes indicated by the highlighted box. This will allow you to choose a file. Choose the wipe_part file we downloaded earlier, do this twice, once for the boot partition and once for the recovery partition.
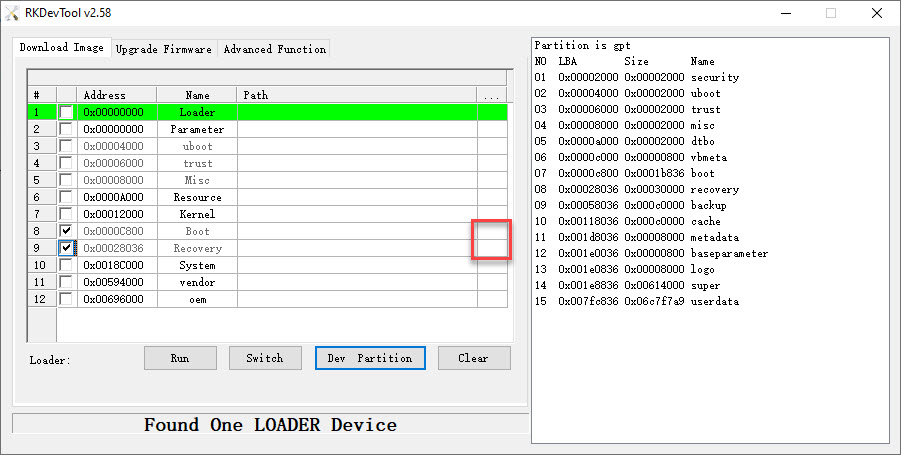
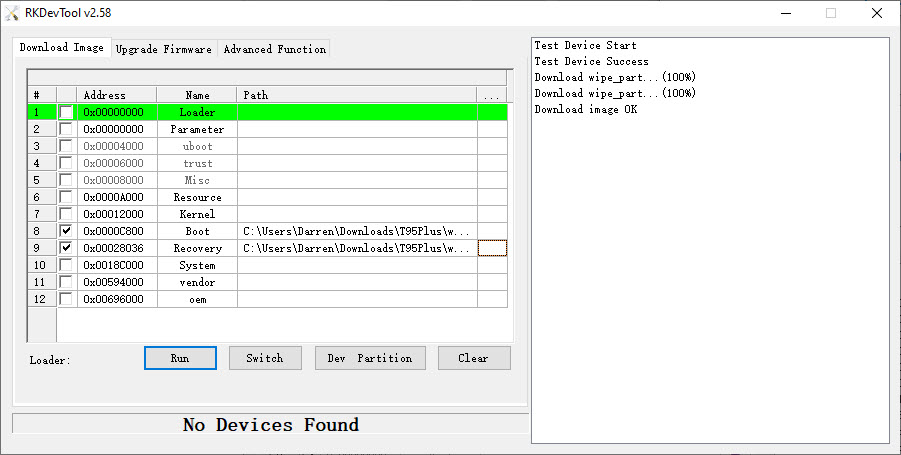
Your screen should now look like the one below, with the partitions and files selected and ready to be flashed. Now hit the ‘Run’ button.
Once you have hit the run you should see the following image. Note the text in the right panel showing two occurrences of wipe_part being downloaded, ie wrote to mmc. Finally, it shows “Download image OK” and “No Devices Found”. The reason it shows the no devices found is because it has now reset the device.
